Deploy EverShop to DigitalOcean App Platform
This guide provides detailed instructions for deploying EverShop to DigitalOcean App Platform with a managed PostgreSQL database. Follow these steps to get your e-commerce store running in a production environment.
Prerequisites
Before beginning the deployment process, ensure you have:
- A DigitalOcean account with billing set up
- A registered domain name (for production use)
- A GitHub account
- A GitHub repository containing your EverShop application code
Getting Started
Prepare Your GitHub Repository
While DigitalOcean App Platform supports multiple deployment methods, this tutorial focuses on deployment via GitHub integration. This approach enables continuous deployment whenever you push changes to your repository.
Ensure your package.json file contains the following scripts that DigitalOcean will execute during deployment:
"scripts": {
    "build": "evershop build --skip-minify",
    "start": "evershop start",
    "user:create": "evershop user:create",
    "user:changePassword": "evershop user:changePassword"
}
Create a New DigitalOcean App
-
Log in to your DigitalOcean account and navigate to the App Platform dashboard.
-
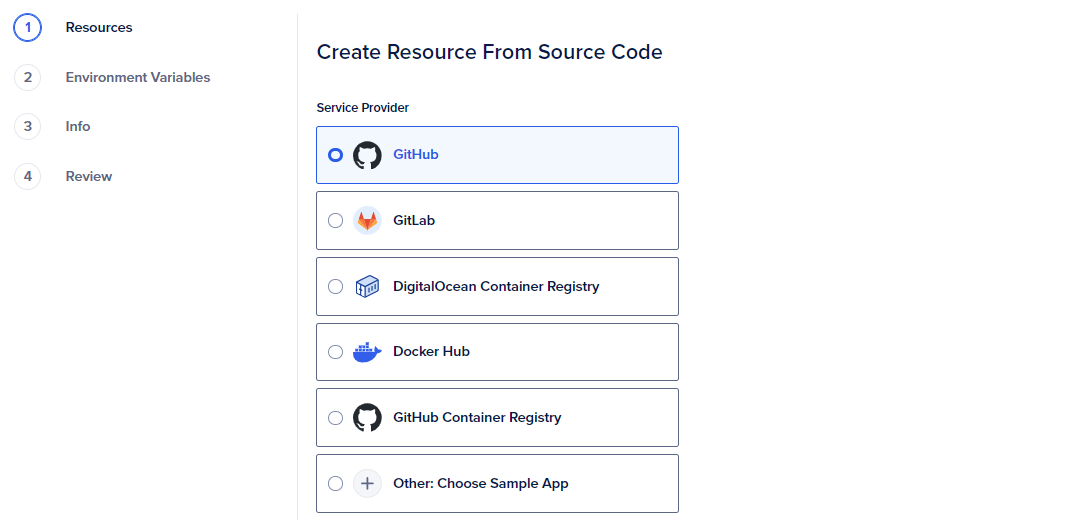
Click the "Create App" button to begin the setup process.
-
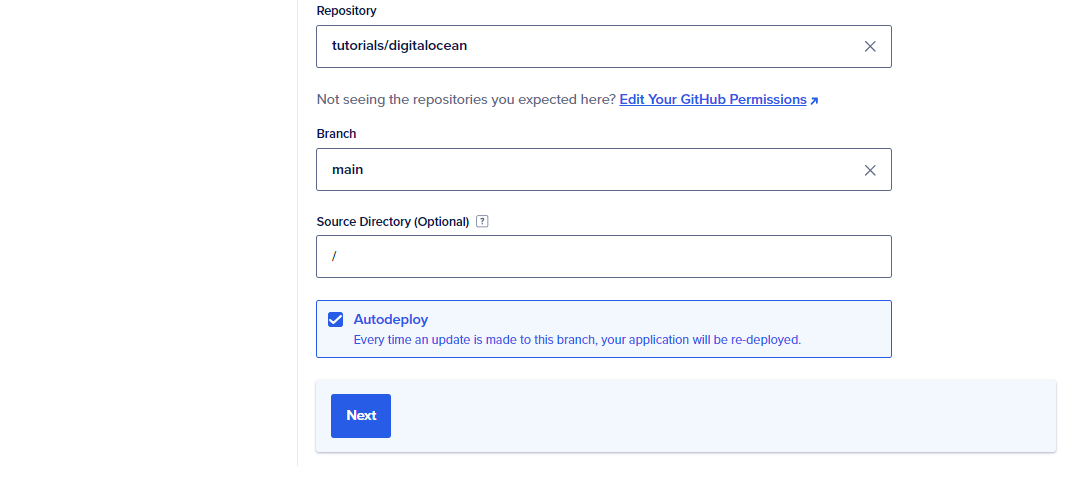
In the "Resources" section, select your GitHub repository containing the EverShop code. If this is your first time connecting GitHub to DigitalOcean, click "Manage Access" to authorize the integration.
-
Configure your deployment settings. You can typically use the default settings, but verify the branch you want to deploy.
- Click "Next" to proceed to the plan selection. Choose the plan that best fits your requirements. For testing or small-scale deployments, the "Basic" plan is often sufficient.
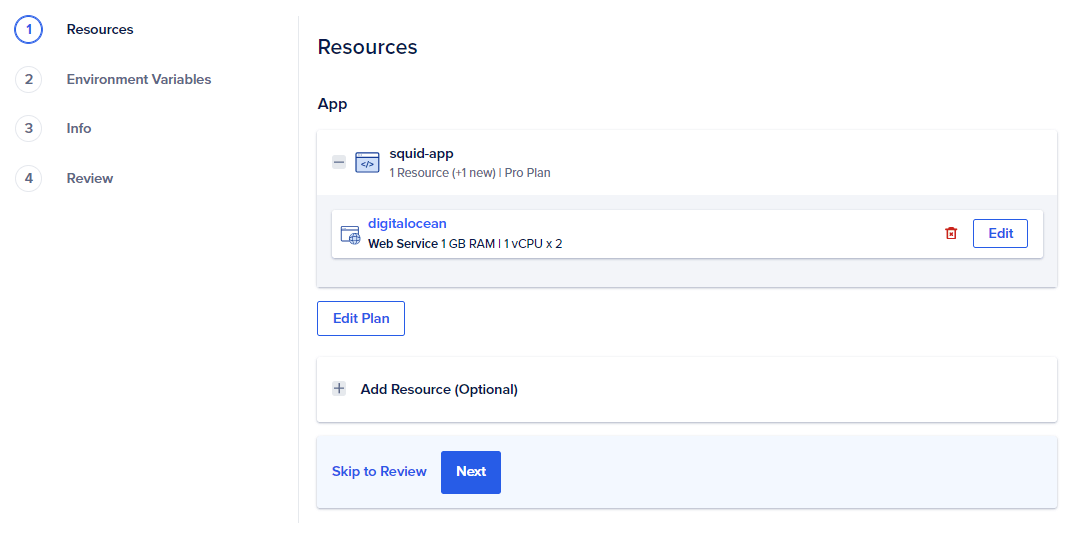
Do not add a database to your app at this stage. EverShop requires PostgreSQL 13 or higher, but DigitalOcean App Platform currently offers PostgreSQL 12 through its integrated database option. We'll create a compatible database separately in the next section.
- For now, leave the "Environment Variables" section empty. We'll configure these after creating the database.
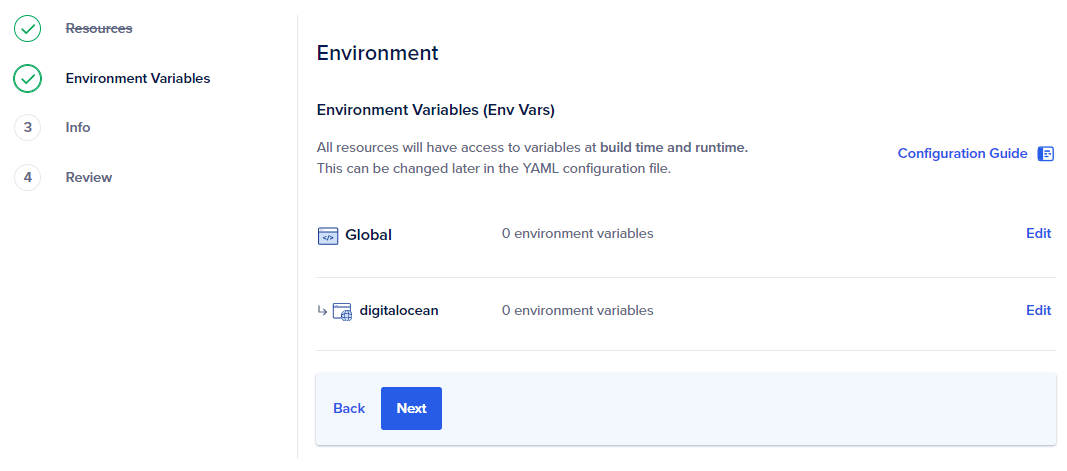
- Complete the "Info" and "Review" sections, then finalize your app creation by clicking "Create Resources."
Create a PostgreSQL Database
EverShop requires PostgreSQL version 13 or higher. Follow these steps to create a compatible managed database:
-
From the DigitalOcean dashboard, click "Databases" in the main navigation menu.
-
Click the "Create Database Cluster" button.
-
Select "PostgreSQL" as the database type and choose version 13 or higher.
-
Select your preferred region, typically the same region as your App Platform deployment.
-
Choose an appropriate plan based on your expected traffic and database usage.
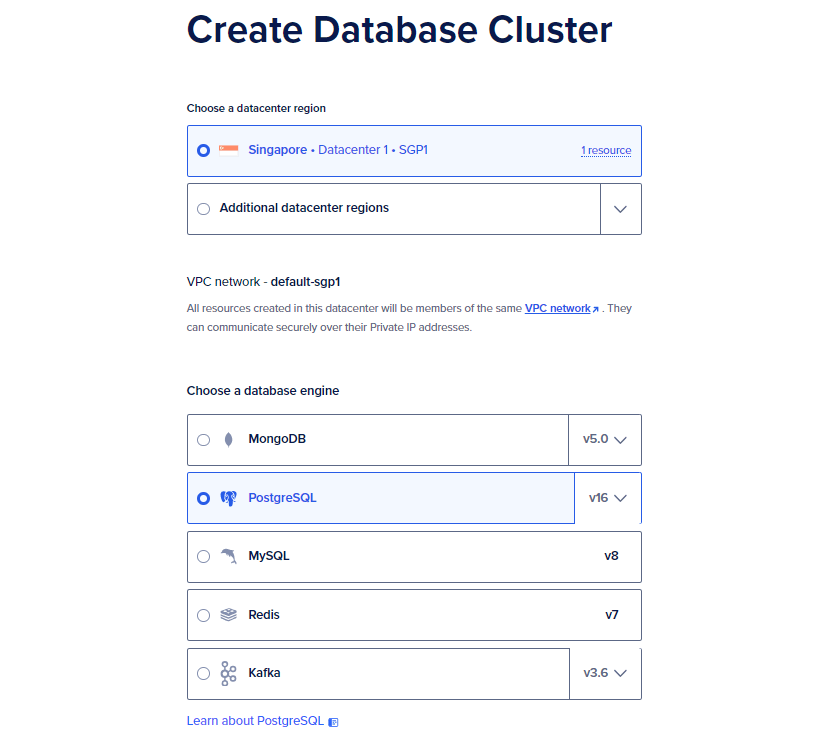
- After the database is created, navigate to its "Overview" page to find the connection details you'll need for the next steps.
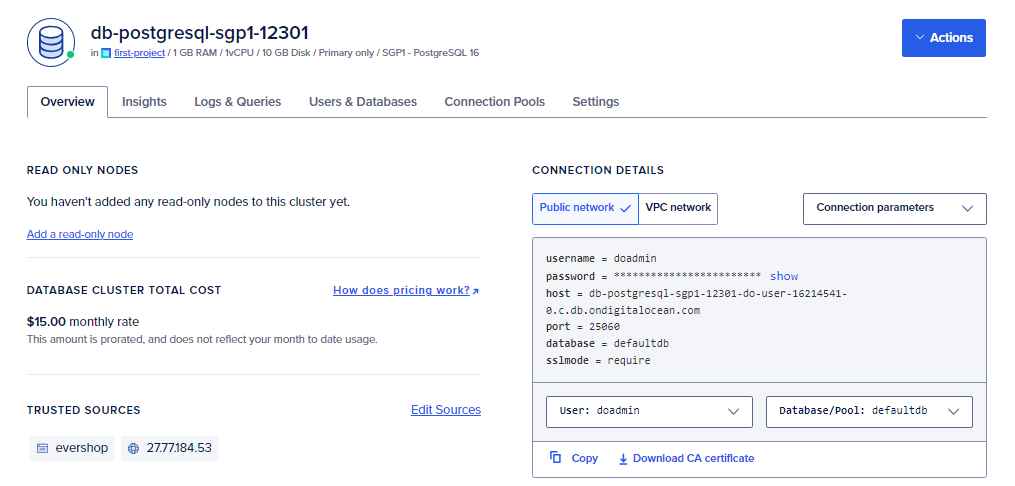
For App Platform integration, you must use the "Public Network" connection method, as DigitalOcean App Platform does not currently support private "VPC Network" connections to managed databases. Consider implementing additional security measures such as IP restrictions if your application handles sensitive data.
Configure Your EverShop Application
Set Up Environment Variables
Now that your database is ready, configure your EverShop application with the appropriate connection details:
-
Return to your App Platform dashboard and select your EverShop application.
-
Navigate to the "Settings" tab and find the "App-level environment variables" section.
-
Add the following environment variables, using the values from your database connection details:
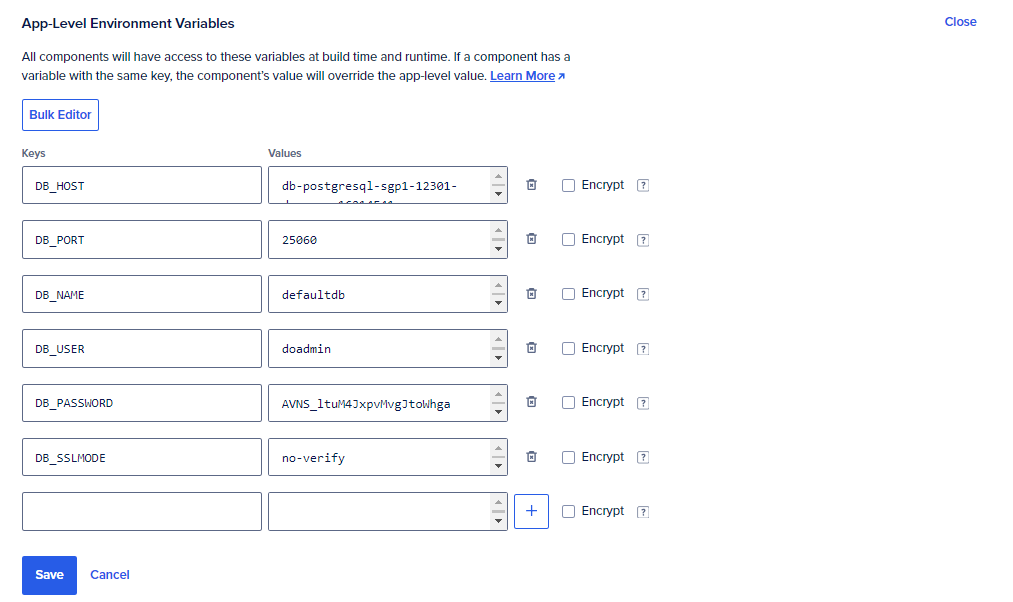
DB_HOST: The hostname of your PostgreSQL databaseDB_PORT: The port number (typically 25060 for DigitalOcean managed PostgreSQL)DB_NAME: Your database nameDB_USER: Your database usernameDB_PASSWORD: Your database passwordDB_SSLMODE: Set tono-verify(orrequireif you've configured proper SSL)
Configure Deployment Commands
To ensure your application builds and starts correctly:
-
In the "Settings" tab, select your app component (typically named after your GitHub repository).
-
Navigate to the "Commands" section.
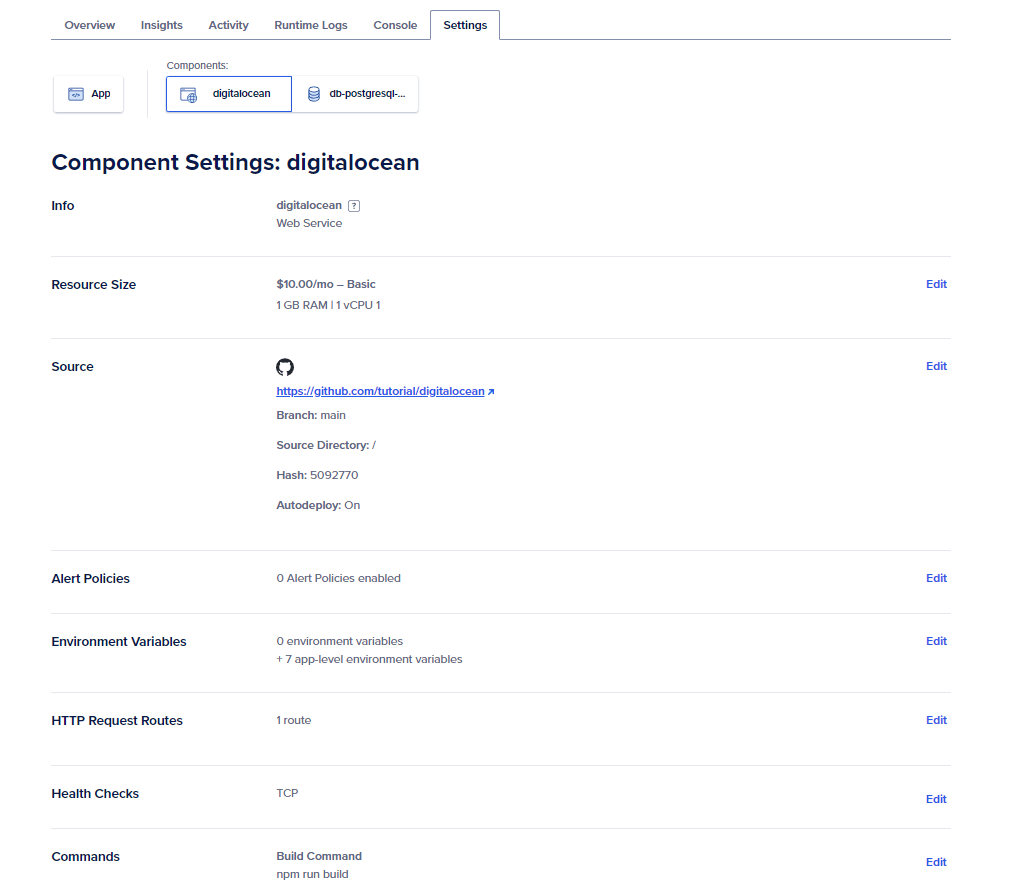
- Verify that the build and run commands match the scripts in your package.json file:
- Save your changes. DigitalOcean will automatically redeploy your application with the new configuration.
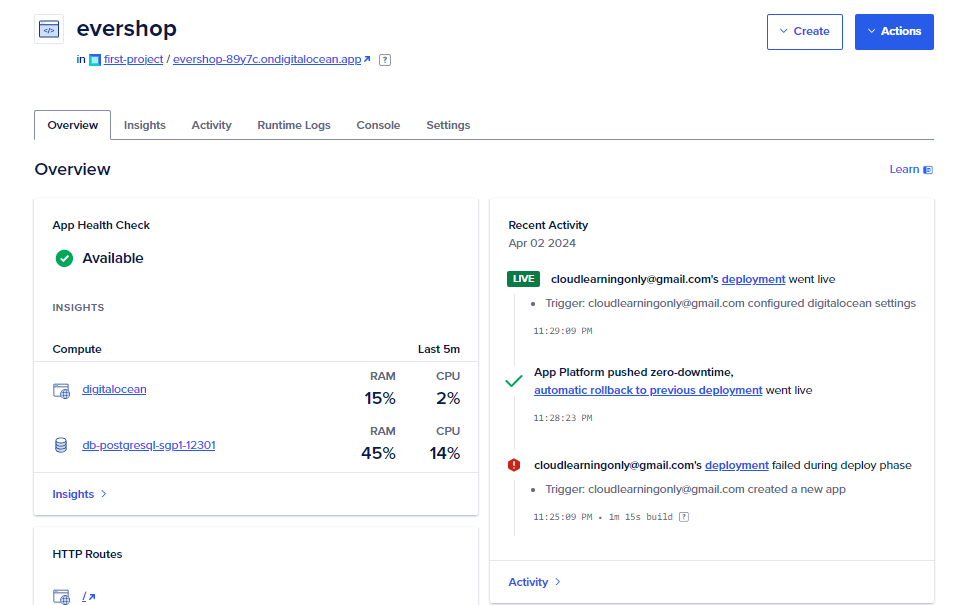
After the deployment process completes, your EverShop application should be up and running on DigitalOcean App Platform. You can verify this by checking the deployment status:
Create an Administrator Account
To access the admin panel and manage your store, create an administrator account:
-
From your App Platform dashboard, select your EverShop application.
-
Navigate to the "Console" tab to access a command-line interface.
-
Run the following command to create an admin user, replacing the placeholder values with your desired credentials:
npm run user:create -- --email "admin@example.com" --name "Admin User" --password "SecurePassword123!"
- Once the command completes successfully, access your admin panel by visiting
https://<your-app-domain>/adminand log in with your newly created credentials.
Next Steps
Congratulations! You've successfully deployed EverShop to DigitalOcean App Platform. Here are some additional steps to consider:
Configure Custom Domain
For production use, configure your custom domain through the App Platform "Settings" tab under the "Domains" section.
Set Up Continuous Deployment
Your application is already configured for automatic deployment when you push changes to your GitHub repository. You can adjust these settings in the "Settings" tab under the "Components" section.
Implement Monitoring
Consider setting up monitoring and alerts through DigitalOcean's Monitoring service to keep track of your application's health and performance.
Regular Backups
Configure regular database backups through the DigitalOcean Managed Database dashboard to protect your store's data.
Performance Optimization
As your store grows, consider scaling your resources in App Platform and optimizing your EverShop application for improved performance.