Deploy EverShop to Microsoft Azure
This comprehensive guide walks you through the process of deploying your EverShop e-commerce platform to Microsoft Azure using Azure App Service and Azure Database for PostgreSQL.
Prerequisites
Before beginning the deployment process, ensure you have:
- An active Microsoft Azure account with subscription access
- An EverShop project installed and running on your local machine
- Git installed on your local machine (for version control and deployment)
Step 1: Create a New Azure Web App
- Log in to the Azure portal at https://portal.azure.com.
-
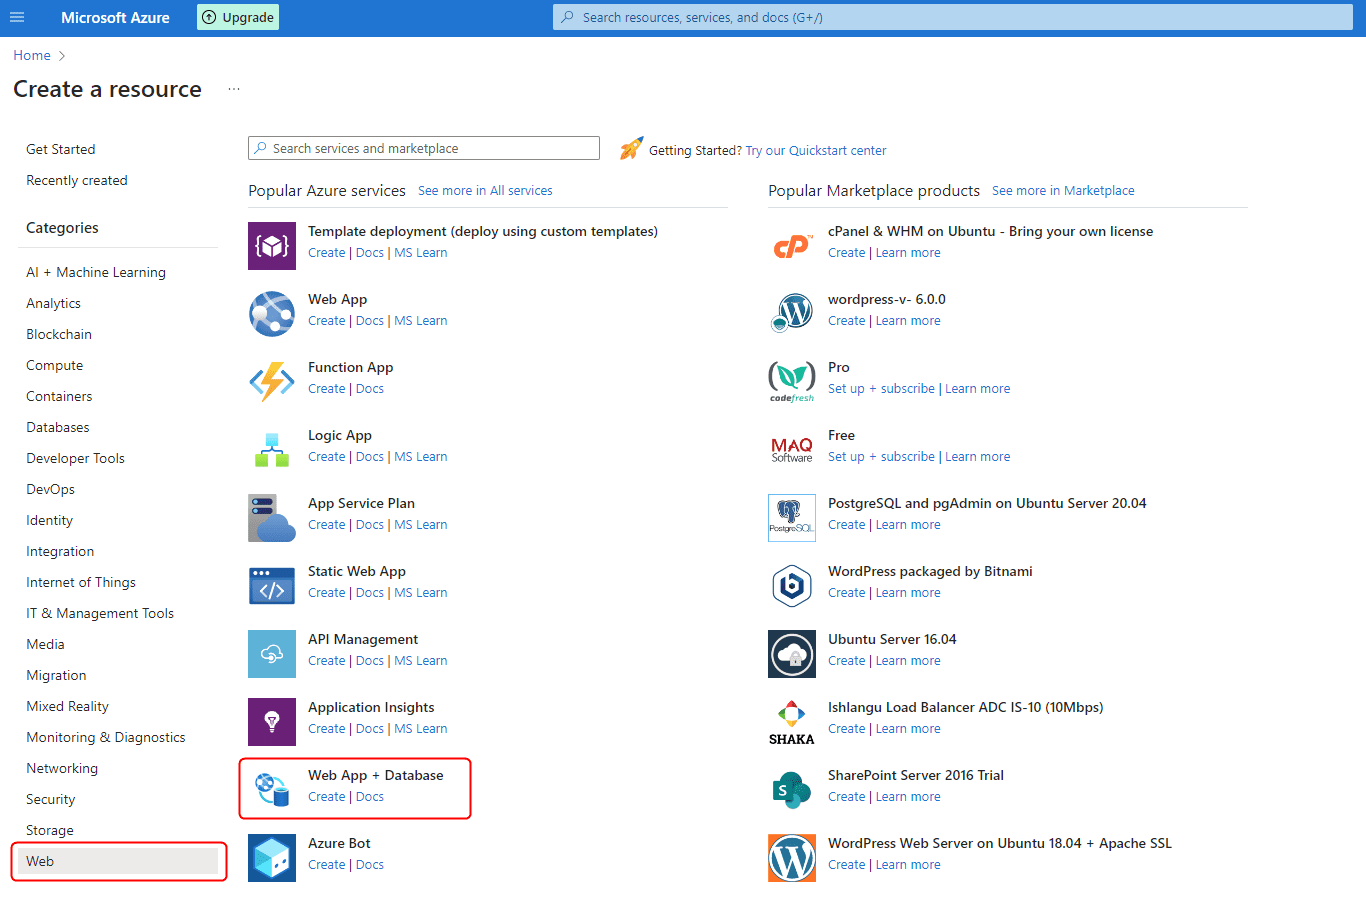
Click the "+ Create a resource" button in the Azure portal dashboard.
-
Search for "Web App & Database" and select it from the search results.
-
Click the "Create" button to begin configuring your web application.
-
Configure your web application with the following settings:
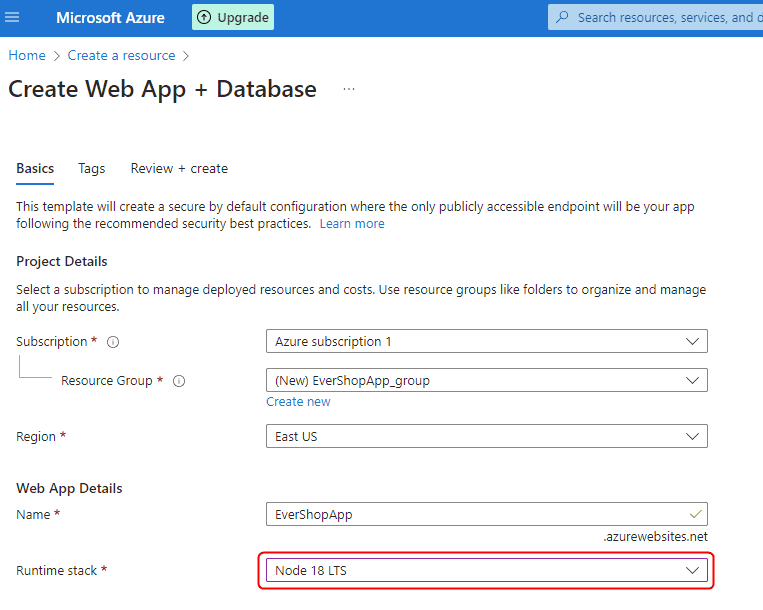
- Configure your database with appropriate settings for your EverShop deployment:
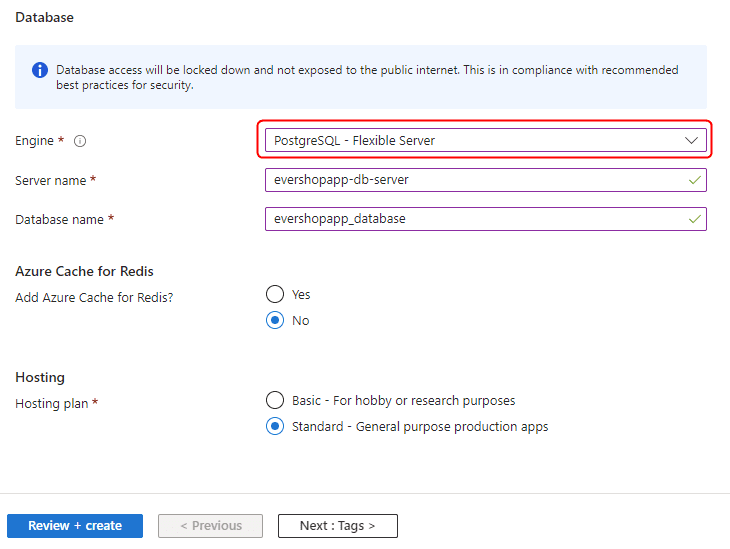
- Click "Review + create" and then "Create" to provision your web application and database. Once completed, you'll see your resources in the Azure portal:

Step 2: Configure Deployment Options
Azure supports multiple deployment methods. For this guide, we'll use the local Git deployment approach:
-
Navigate to your newly created web app in the Azure portal.
-
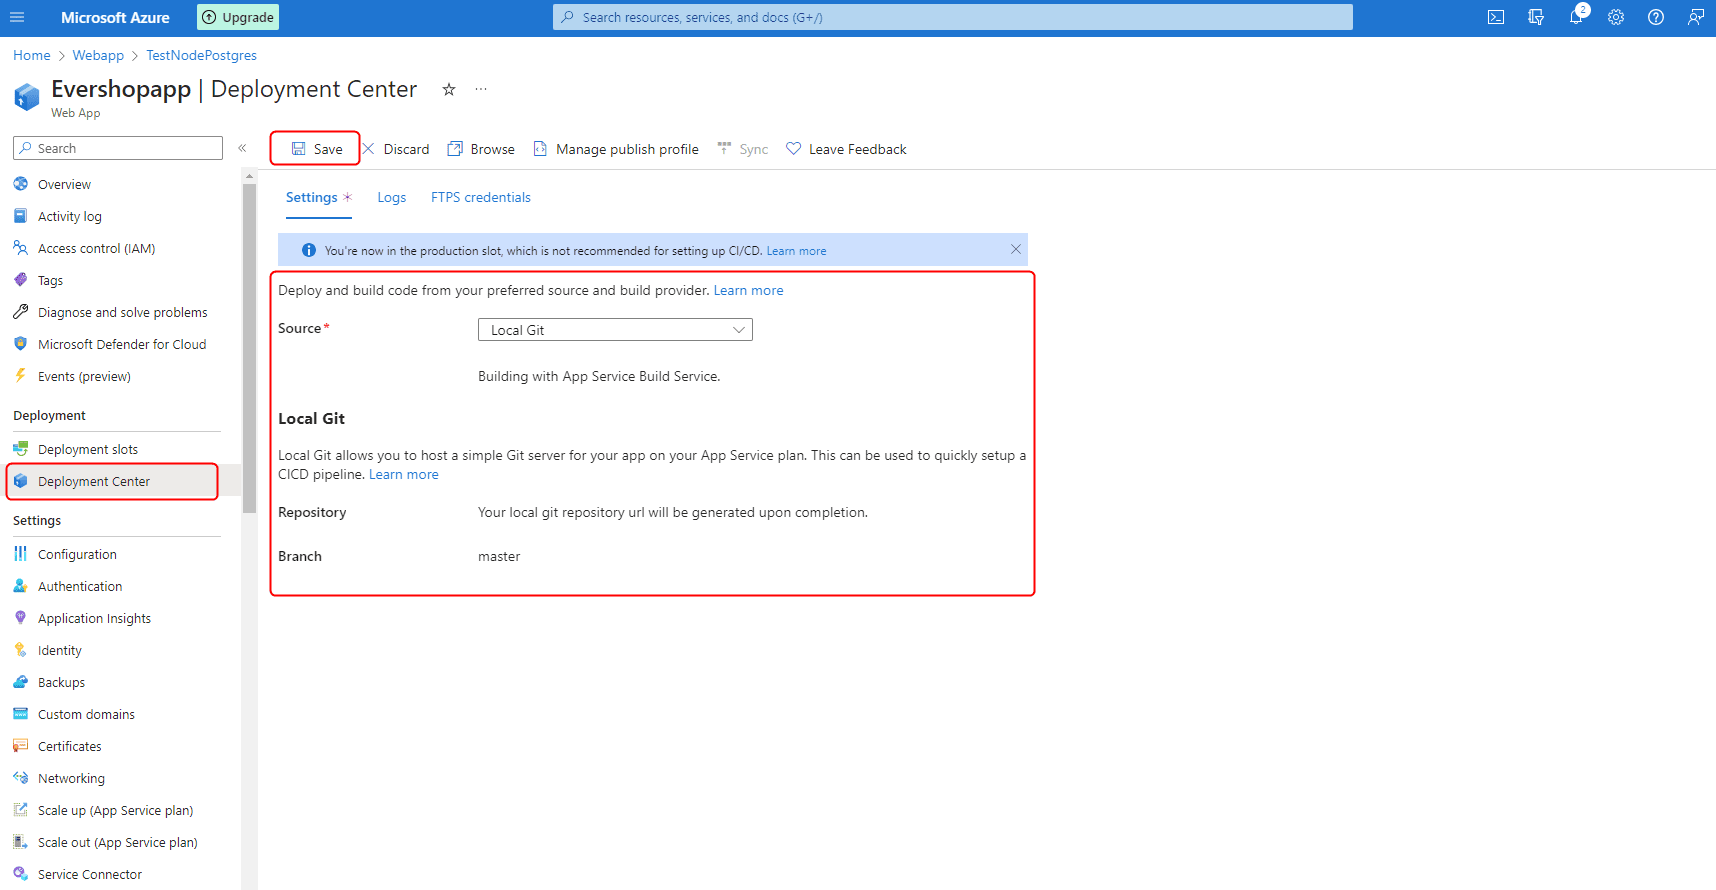
In the left menu, select "Deployment Center."
-
Choose
Local Gitas your deployment option. -
Click the "Save" button to confirm your deployment configuration.
Step 3: Add Git Remote to Your Local Project
After configuring the deployment options, Azure will generate a Git URL for your repository:
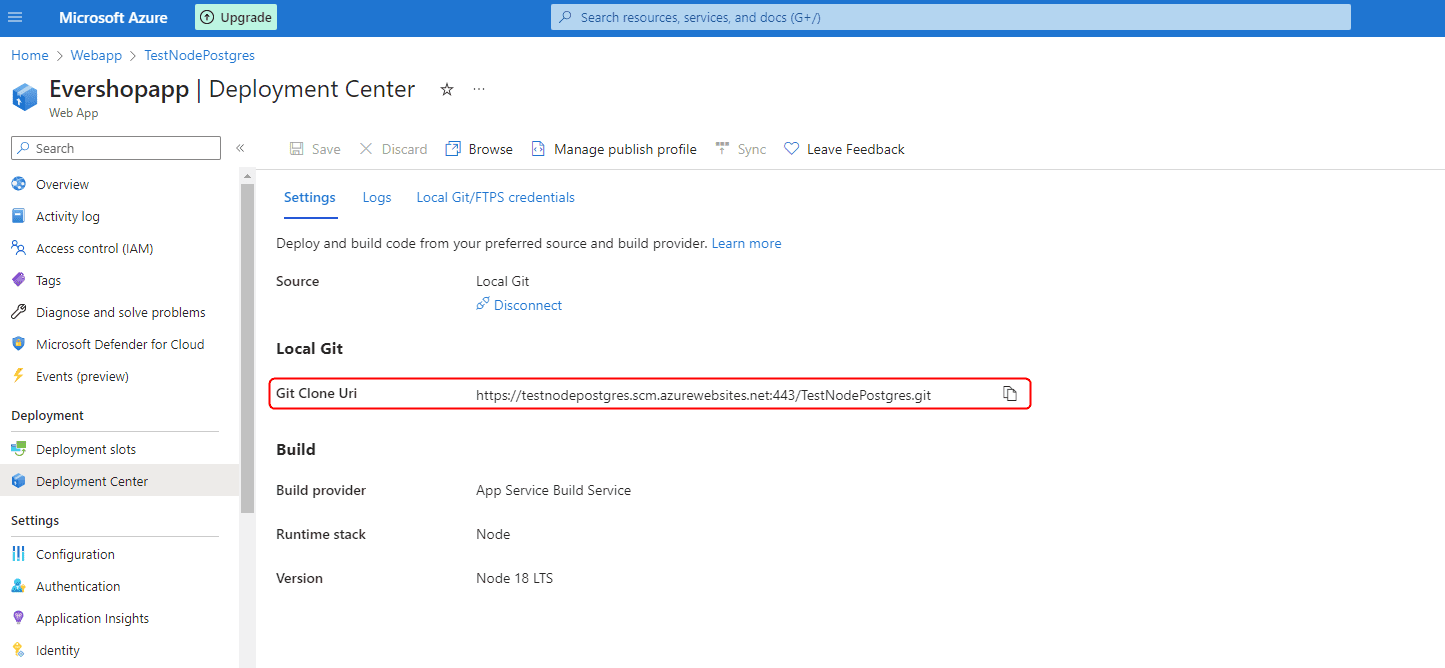
Add this Git remote to your local EverShop project:
git remote add azure <your-git-url>
If your local project is not already a Git repository, initialize one first by running:
git init
Then add and commit your files before proceeding to the next step:
git add .
git commit -m "Initial commit for Azure deployment"
Step 4: Configure Your Local Project
Configure NPM Scripts
Azure's deployment process automatically runs npm install followed by npm run build. Ensure your package.json file includes these scripts:
{
  "name": "evershop",
  "version": "1.0.0",
  "description": "",
  "main": "index.js",
  "scripts": {
    "build": "evershop build --skip-minify", // For faster builds, omit --skip-minify to enable full minification
    "start": "evershop start",
    "user:create": "evershop user:create",
    "user:changePassword": "evershop user:changePassword"
  },
  "workspaces": ["extensions/*"],
  "author": "EverShop",
  "license": "ISC",
  "dependencies": {
    "@evershop/evershop": "^1.0.0-rc.8"
  }
}
Add PM2 Configuration File
Azure App Service uses PM2 as its Node.js process manager. Create a PM2 configuration file in your project root:
module.exports = {
  apps: [
    {
      name: "evershopAzure",
      script: "npm",
      env: {
        NODE_ENV: "production",
      },
      args: "run start",
    },
  ],
};
Create a .gitignore File
Your local project structure should look similar to this:
├── .evershop
├── .log
├── extensions
├── media
├── themes
├── node_modules
├── public
├── .env
├── ecosystem.config.js
├── package.json
├── package-lock.json
└── README.md
Create a .gitignore file to exclude unnecessary files from deployment:
.evershop
.log
node_modules
.env
Step 5: Configure Environment Variables
EverShop requires specific environment variables for database connectivity. Configure these in the Azure portal:
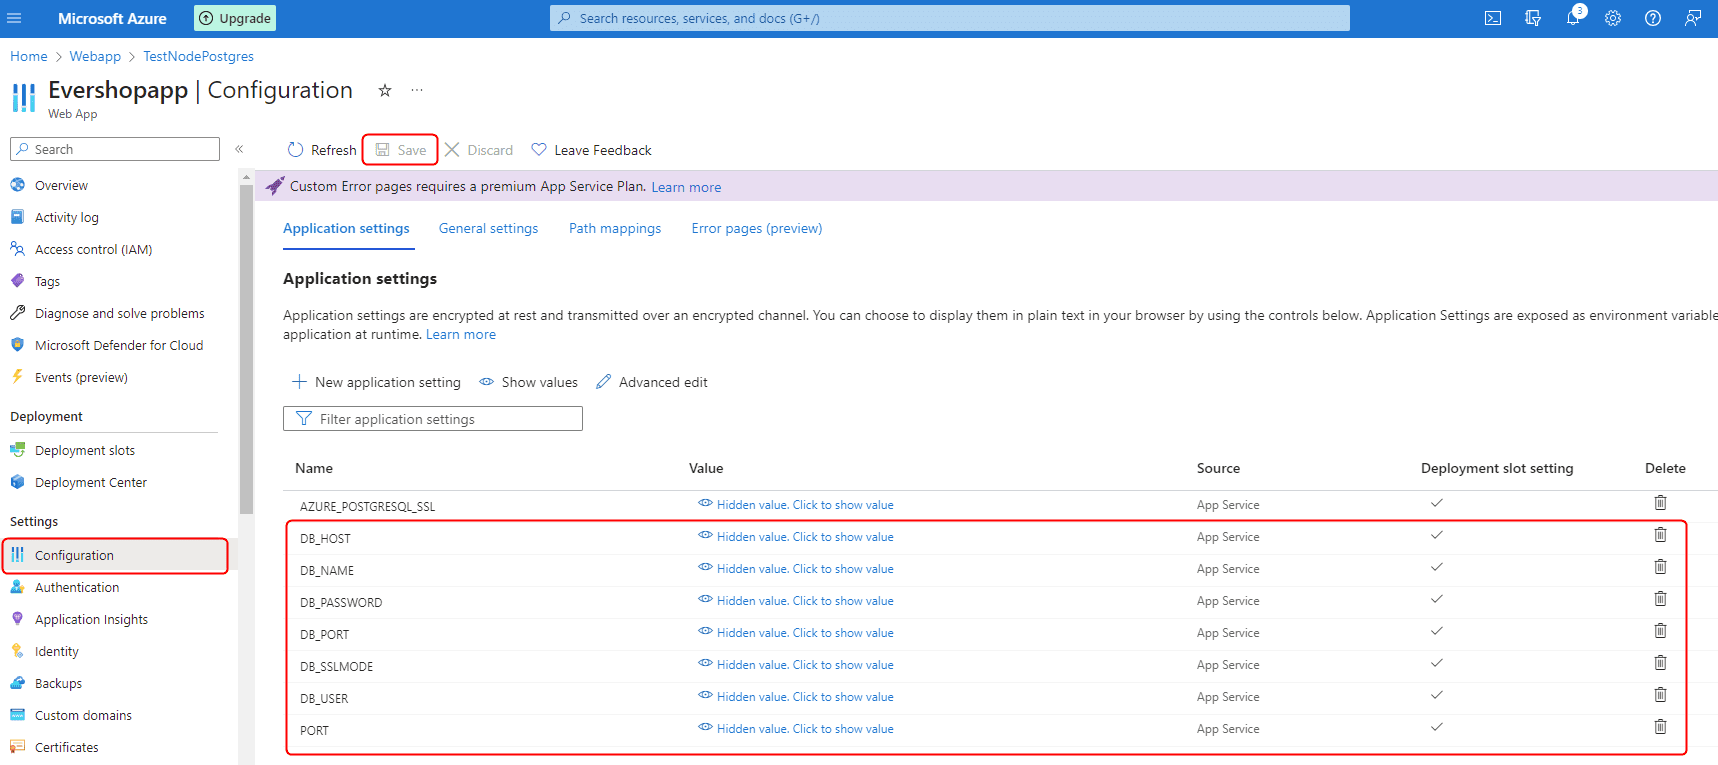
- Go to your web app in the Azure portal and navigate to the "Configuration" section.
-
Rename the following default Azure PostgreSQL environment variables to match EverShop's expected names:
AZURE_POSTGRESQL_DBNAME→DB_NAMEAZURE_POSTGRESQL_USERNAME→DB_USERAZURE_POSTGRESQL_PASSWORD→DB_PASSWORDAZURE_POSTGRESQL_HOST→DB_HOSTAZURE_POSTGRESQL_PORT→DB_PORT
-
Add these additional required environment variables:
DB_SSLMODE: Set torequireto enable SSL connections to the databasePORT: Set to3000to specify the port EverShop will use
- Save your configuration changes.
Step 6: Deploy Your Project
With configuration complete, deploy your EverShop application to Azure:
git push azure master
During your first deployment, Azure will prompt you for Git credentials. You can find these in the "Deployment Center" section of your web app:
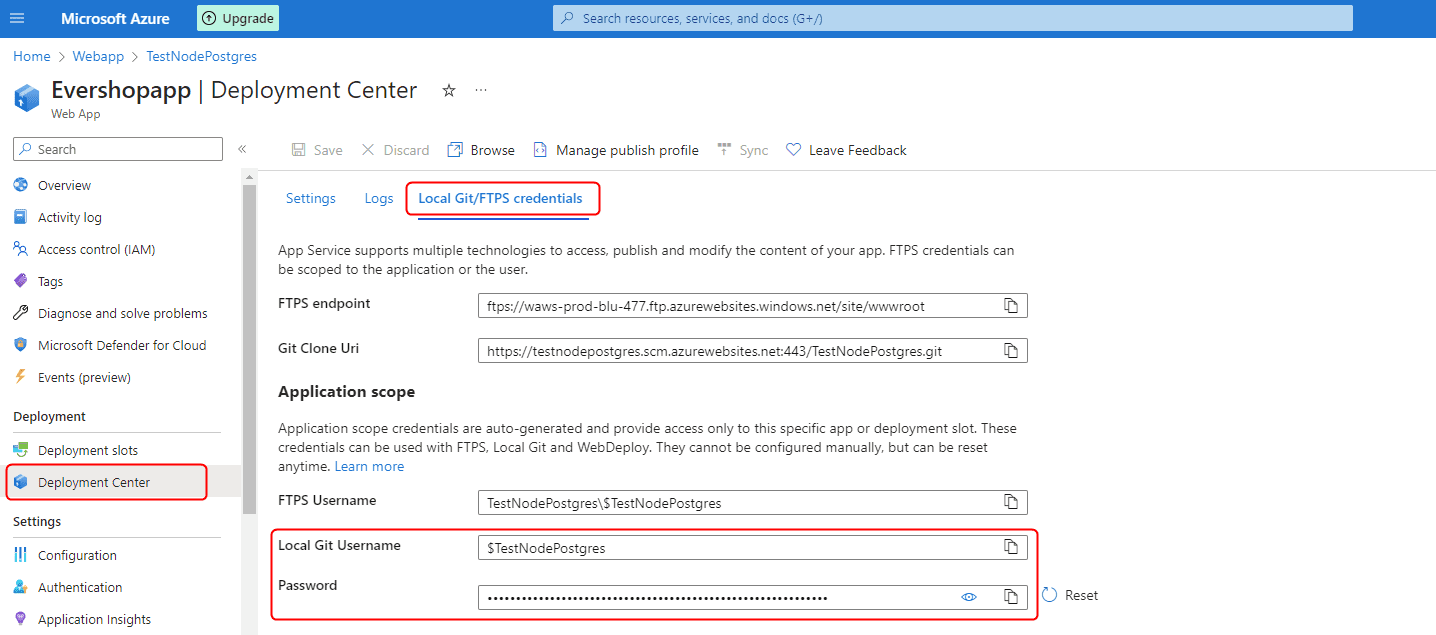
The initial deployment may take several minutes. Once completed, your site will be accessible at the URL provided by Azure:

Step 7: Create an Administrator Account
After deploying your EverShop store, create an administrator account:
- Connect to your web app using the SSH feature in the Azure portal.
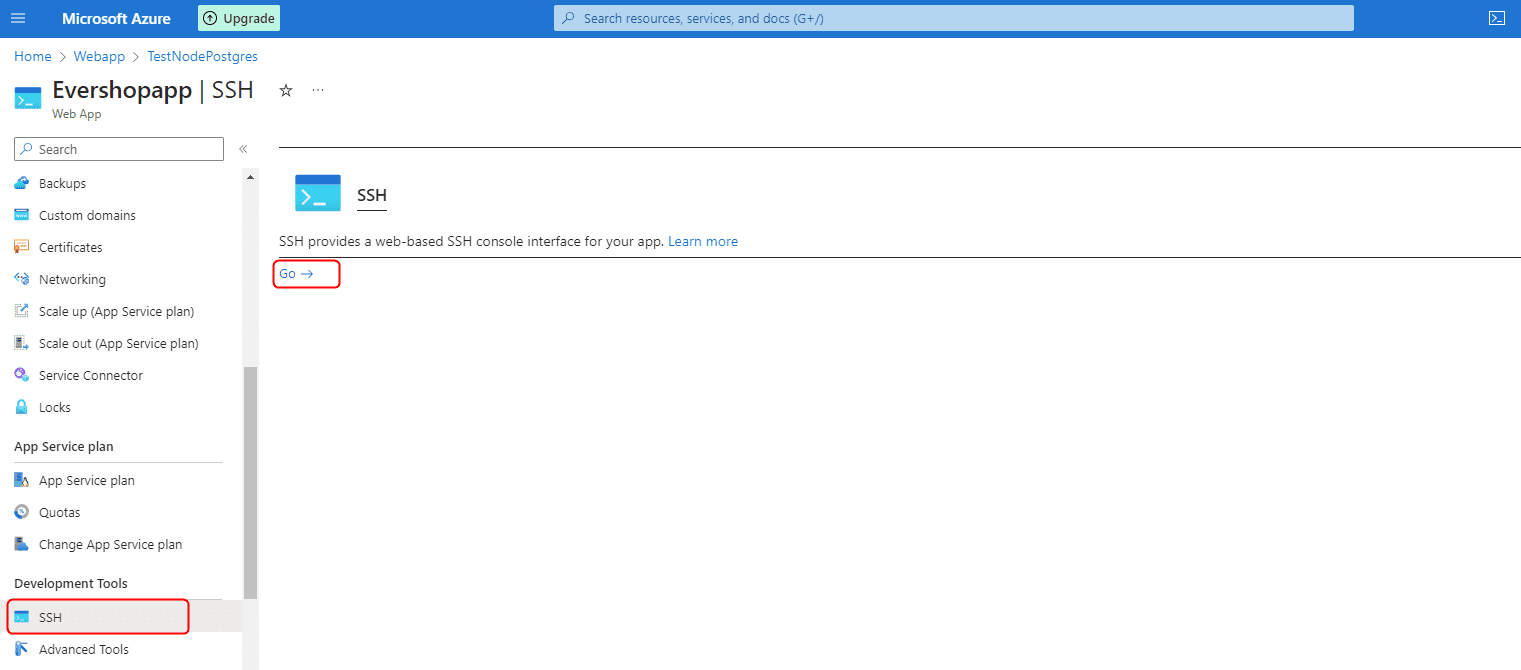
- Navigate to your application directory:
cd /home/site/wwwroot
- Create an admin user:
npm run user:create -- --email "admin@example.com" --password "securePassword" --name "Admin Name"
- Access your admin panel at
https://<your-azure-domain>/adminand log in using the credentials you just created.
Step 8: Configure Custom Domain (Optional)
To use your own domain instead of the default Azure domain:
-
Navigate to the "Custom domains" section in your web app's settings.
-
Follow the Azure Custom Domain Configuration Guide to map your domain to your Azure web app.
Troubleshooting
If you encounter issues during deployment or while running your EverShop store on Azure:
- Check the application logs in the Azure portal under "App Service logs"
- Verify your environment variables are configured correctly
- Ensure your database connection is working properly
- Confirm that your PM2 configuration is correct
Performance Optimization
For optimal performance of your EverShop store on Azure:
- Enable Azure CDN for faster content delivery
- Configure auto-scaling based on your expected traffic patterns
- Use the appropriate App Service pricing tier for your needs
- Consider adding Redis Cache for improved performance